The demo truck feature demonstrates the tests and data available to various Bendix ECU versions and configurations.
Select from the available options to create a custom demo connection to explore.
NOTE: This is for demonstration purposes only. Tests and data may not function realistically.
Related Products:
2023 JPRO Commercial Vehicle Diagnostics Software Download & Installation Service
2023 Bendix Acom Pro V3 ABS ATC Diagnostic Software Installation Service
Procedures:
1.Select the F8 key or the Connect button on the main toolbar.
2.You will be prompted for the connection type. Select the Truck Simulators button.
3.Select the vehicle to simulate.
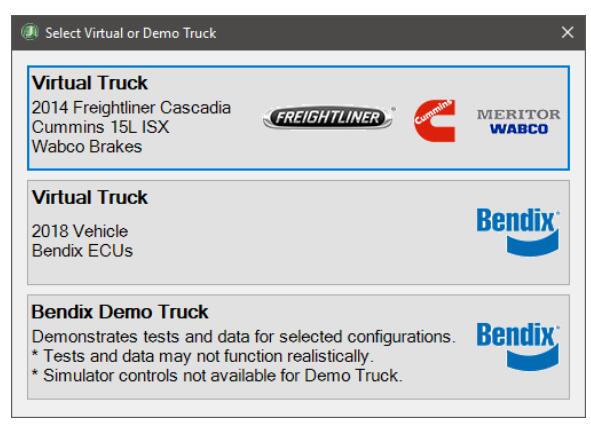
4.Choose Bendix Demo Truck from the Select Virtual or Demo Truck screen.
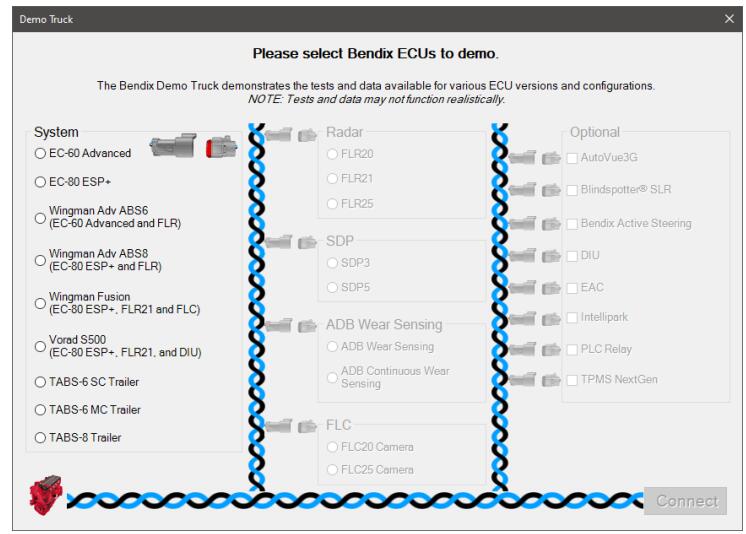
5.Select the desired System option to enable appropriate required and optional ECU selections. Once all required selections have been made the Connect button will become available. Select Connect to begin the demonstration.
6.The demonstration will behave like a Heavy-Duty vehicle connection. The Vehicle Readiness, Fault Code Information and Key Data Points windows are displayed with demo faults and data from the selected ECUs.Initially, the top portion of the Vehicle Readiness window will indicate the gathering the vehicle’s information.Once all vehicle information has been retrieved, the health of the vehicle is displayed.
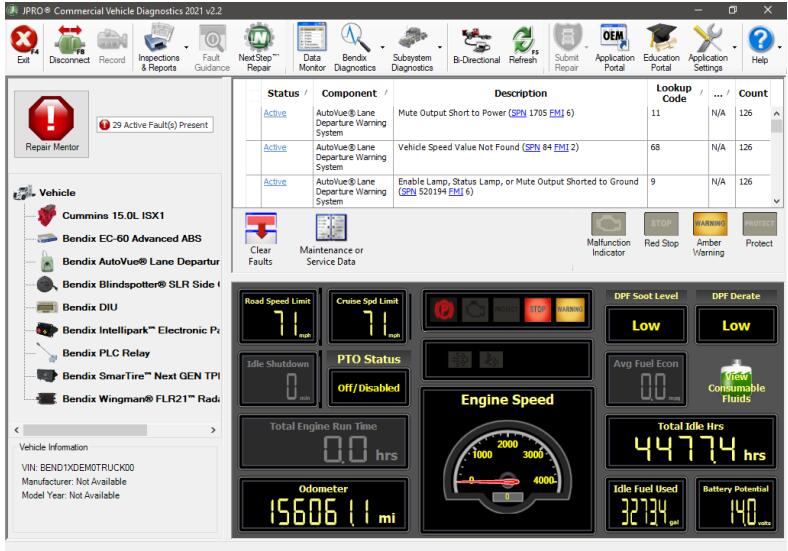
7.Explore JPRO features such as Data Monitor and bi-directional tests to view the options available for the selected ECUs.
NOTE: The ability to initiate a Recording or Submit Warranty are not available when connected to the Bendix Demo Truck.
8.Select the F8 key or the Disconnect button on the main toolbar to close the demo truck session.

